It’s Almost Time: Halloween Creeps Closer

Halloween is just days away, and I hope you all have everything ready for the big night.  I’m currently on vacation in the Big Easy, so – don’t be jealous – I might be on a ghost tour as you’re reading this.  I’ve had to get things ready a little early this year because of my vacay, and since I made a checklist to ensure I wouldn’t leave anything out, I thought I’d share with everyone.

Halloween Checklist

Candy – Go big if you can.  This is some kids’ favorite night of the year, and a full-size candy bar makes it that much…sweeter (I couldn’t resist).

Teal Pumpkin – Some children have deadly allergies, so they can’t partake in the usual sweet treats this time of year.  Thanks to the Teal Pumpkin Project, you’ve got a way to help them out.  Set out a teal pumpkin and provide non-food treats so that everyone can participate.

Costume – Have all parts of your costume ready.  You definitely don’t want to venture out to a Halloween store on the day.  It’s a freakin’ madhouse.

Jack O’ Lantern – You definitely don’t want to forget your carved pumpkin because you don’t want the spirits messing with you.

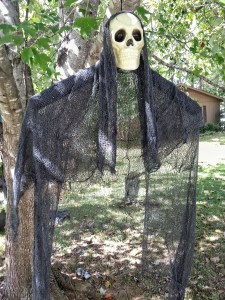
Decorations – For god’s sakes, put out something creepy.  It’s not hard.  Spiderwebs are so easy.  Foam tombstones are super-cheap.  I just don’t see enough Halloween decorations nowadays, and it just makes me sad.

Food – If you’re having a party, check out Pinterest for some great ideas for creepy appetizers and deadly desserts.  Or if you want to go easy, make sure you order pizza way ahead of time.  Halloween is one of the busiest nights for pizza places.  Don’t call too late.

Shopping List – I don’t know about you, but the day after Halloween is my biggest shopping day of the year.

I hope everyone is ready for the big night!

Easy Halloween Cupcakes

Looking for an easy dessert for your Halloween party?  Look no further than the cupcake.  They’re easy to make, and with some Halloween-themed cupcake holders and a little bit of icing and candy, you can make a creepy and disgusting (looking) treat.

img_0333

Check out this ghost cupcake I made with just a little bit of chocolate and vanilla icings.  All you need to do is freehand a blob.  I happened to have some Halloween sprinkles on hand, so the eyes and mouth were crazy simple.

This is also the time of year you can find some gross-looking candy, so put it to good use.  I was looking for some gummy body parts, but I happened upon some eye gum balls that I opted to use instead.

I made two different types with the eyes.  I used some food coloring to make a nasty green icing and layered that atop a dark chocolate cupcake.  Add some sprinkles and the gumball, and you’ve got a cauldron:

img_0332

I also just really felt like making some edible blood, so these vanilla cupcakes turned out really nice:

img_0331

The Walking Dead spoiler alert!!!  I made these in honor of fallen hero Glen’s death.  Poor guy.  I don’t know about you, but that hit me hard.

I hope you have fun with your Halloween treats!

Ouija: Origin of Evil (2016)

Last week, my husband stumbled upon a movie cash code that I thought was lost forever, and when I redeemed it online, I learned that it expired at the end of the month.  That didn’t give me much time, and since it’s so close to Halloween, I couldn’t NOT go to a horror movie.  That would have been stupid.

My choices were limited as Boo! A Madea Halloween and Ouija: Origin of Evil are the only horror movies in theaters right now (side note: What the hell is up with that?).  I gravitate toward scarier, of course, so Ouija it was.

I have to say that the movie very much exceeded my expectations.  I enjoyed the first one to an extent because I will pretty much like any horror movie I watch, but it wasn’t the greatest.  Just your average teen ghost/supernatural thriller.  It had a few scares, but overall it wasn’t anything to freak out about.  This one was a different story.  It had a creepy plot and didn’t rely solely on jump scares to frighten the audience.

Warning: Here Be Spoilers

I’m not going to go into too much detail here.  The actresses and actors involved did a wonderful job, but the standout performance of the movie was Lulu Wilson, who starred as Doris.  If you remember the first movie, that is the ghost’s name from the original. Doris, like many creepy kids in horror movies, started off cute and just went downhill really quickly after messing with a – dun dun DUN! – Ouija board.  If you weren’t already aware, that was a mistake.

I guess I just didn’t file the original in my brain for very long because I didn’t get until almost the end that these characters were actually connected to the original movie.  I felt pretty stupid, but it also made me enjoy the movie a lot more since I had one of those “Oooohhhh” moments as the movie was reaching its height,

I am completely fine with horror movies that don’t have a very happy ending, so the ending of this movie was – I felt – very appropriate and enjoyable.  My mom disagrees, but I think it takes something away from the creepiness of a film to have everything work out just right.  Since I finally realized near the end that these were the same characters, I figured out where it was heading, and I thought they did a great job of playing it out.

I also want to point out the nod to The Exorcist when the priest, played by Henry Thomas, stops outside the Zander home with his bag of religious goodies.  I love shit like that.

My recommendation is that you go watch this one in theaters to celebrate the holiday.  I’m a fan, and it even made me want to watch the first movie again.

Halloween Party Music List

It’s almost time to break out the costumes, candy, and party food, people!  It’s also time to make sure you have the right tunes to set the mood for your Halloween party.  I’ve put together a list of songs that remind me of my favorite holiday – from movie themes to monster titles to straight Halloween songs.  I hope this helps you set the mood.

(Don’t Fear) The Reaper – Blue Oyster Cult

(Ghost) Riders in the Sky – Johnny Cash

Abracadabra – Steve Miller Band or Sugar Ray

Addams Family Groove – Mc Hammer

Bad Moon Rising – Credence Clearwater Revival

Bad Things – Jace Everett

Beetle Juice theme – Danny Elfman

Black Magic Woman – Fleetwood Mac

Burn the Witch – Queens of the Stone Age

Creep – Radiohead

Dead Man’s Party – Oingo Boingo

The Devil Went Down to Georgia – Charlie Daniels Band

Disturbia- Rihanna

Dragula – Rob Zombie

Enter Sandman – Metallica

Feed My Frankenstein – Alice Cooper

Ghostbusters – Ray Parker Jr.

Halloween (Michael Myers ) theme – John Carpenter

Halloween – The Misfits

Halloweenhead – Ryan Adams

Highway to Hell – AC/DC

Hotel California – Eagles

Howlin’ for You – The Black Keys

Hush, Hush, Hush Here Comes the Bogeyman – Henry Hall

I Put a Spell on You – Screamin’ Jay Hawkins

I’m Your Boogie Man – KC and the Sunshine Band

Jeepers Creepers – Louis Armstrong

Living Dead Girl – Rob Zombie

Love Potion NO. 9 – The Searchers

Monster – Kanye West (ft. Jay-Z and Nicki Minaj)

Monster Mash – Bobby ‘Boris’ Pickett & the Crypt-Kickers

Paint It Black – Rolling Stones

People Are Strange – The Doors

Pet Sematary – Ramones

Psycho Killer – Talking Heads

Red Right Hand – Nick Cave & The Bad Seeds

Runnin’ with the Devil – Van Halen

Season of the Witch – Donovan

She Blinded Me wits Science – Thomas Dolby

Sleepy Hollow theme – Danny Elfman

Somebody’s Watching Me – Rockwell

Superstition – Stevie Wonder

Sweet Dreams (Are Made of This) – Marilyn Manson or Eurythmics

Tales from the Crypt theme – Danny Elfman

This Is Halloween – Danny Elfman (Nightmare Before Christmas)

Thriller – Michael Jackson

Time Warp – Little Nell (Rocky Horror Picture Show)

Trick or Treat – Otis Redding

Tubular Bells Part 1 – Mike Oldfield (The Exorcist)

Walk Like a Zombie – Horrorpops

Werewolves of London – Warren Zevon

When the Man Comes Around – Johnny Cash

Who Do You Voodoo, Bitch – Sam B (Dead Island soundtrack)

Witchcraft – Frank Sinatra

Witchy Woman – Eagles

Zombie – The Cranberries


5 Ways to Use a Dollar Tree Skull

It’s no secret that I love Dollar Tree, and one of the reasons I love it so, so much for my Halloween shopping is that you can make so many of their items look more expensive with only a little bit of work.

Of all the Halloween items they carry, their skulls are my favorite.  I always pick up a few each year.  This year, just to help you out, I bought a few more than usual to play around with.  But with them being just a dollar, it was totally worth it.

Processed with Snapseed.
Processed with Snapseed 

1. Use metallic spray paint to make your skulls look at home in any chic Halloween setup.

Processed with Snapseed.

2. Who doesn’t love a sugar skull?  Spray paint a skull white and go to town with multicolored sharpies, paint pens, stickers, and jewels.  It’ll look great at any Day of the Dead celebration.

image

3. Transform a skull into a mini jack-o-lantern by carving it with a craft knife.   Insert a flameless tea light and – voila! – glowing skull!  You can even spray paint it orange for a faux skull pumpkin or other colors to match your decor.

Processed with Snapseed.

4. Make your skull look gross and creepy – and much more like a high-end prop – by using the corpsing technique I outlined here.

Processed with Snapseed.

5. Grab a few items you probably already have on hand and make this cool hanging ghost.  Read the tutorial here.

Processed with Snapseed.

SO. MUCH. FUN.  I hope you try out a few of these projects because you’ll be missing out if you don’t.  Let me know how your projects work out in the comments. Happy Haunting!

Upcoming Halloween TV

One of my favorite things about this time of year is that it’s so very easy to find a Halloween-themed show or scary movie on TV any ol’ time.  If you’re looking for what to watch, look no further.  I did the research so you don’t have to miss any of your favorites.

TV Episodes/Movies

October 14

All-Star Halloween Spectacular (HGTV)

October 16

The Simpsons  “Treehouse of Horror XXVII” (Fox)

October 18

Brooklyn Nine-Nine “Halloween IV” (Fox)

October 19

It’s the Great Pumpkin, Charlie Brown (ABC)

October 20

The Rocky Horror Picture Show: Let’s Do the Time Warp Again (live musical) (Fox)

October 23

Bob’s Burgers “Teen-A-Witch” (Fox)

The Walking Dead (season premier) (AMC)

October 25

The Middle  “Halloween VIII: The Heckoning” (ABC)

American Housewife “Westport Zombies” (ABC)

Fresh Off the Boat “Louisween” (ABC)

The Real O’Neals “The Real Halloween” (ABC)

October 26

Modern Family “Halloween 4: The Revenge of Rod Skyhook” (ABC)

The Goldbergs “Stefan King” (ABC)

Speechless “H-A-L-HALLOWEEN” (ABC)

Black-ish “The Purge” (ABC)

Series/Events

American Horror Story: Roanoke: The much-anticipated 6th season of this crazy series premiered on September 14 on FX, and you can catch new episodes on Wednesday nights.  Catch up on the FXNow app if you’re behind!

Scream Queens: Season 2 began on September 20 on Fox.  New episodes can be watched each Tuesday night.

Halloween Wars: The first episode premiered October 2 on Food Network, but you can watch new episodes every Sunday through October 30.

Halloween Baking Championship: The first bake-off of the season premiered October 3 on Food Network. You can watch new episodes every Sunday through October 31.

AMC Fearfest: There will be over 60 different horror movies running from October 16 through October 31 on AMC.

13 Nights of Halloween: Watch fun movies each night on ABC Family from October 19 through October 31.

image

Looks like we all have quite a bit to keep us busy until the big night!  Enjoy these glory days while you can.  Before you know it, we’ll be inundated with Christmas music and sappy tv shows, and we’ll have to satisfy our horror cravings with Nightmare Before Christmas and Black Christmas.  That’s not really a bad thing, but we definitely have more options this time of year.

Are there any shows coming up that I missed?  Let me know in the comments or contact me through the contact page.

Reaper Madness: How to Make an Easy Floating Ghost

Nothing dresses up a yard at Halloween time more than a floating ghost.  Stores carry these guys plus floating zombies, monsters, and clowns, but they can get pretty pricey for some reason.  Luckily for you, these are crazy easy to make.  Please follow along, class.

First, as with all projects, you need to gather your materials.

Processed with Snapseed.

For your floating ghost, you will need the following:

  • A plastic skull
  • Creepy cloth
  • String
  • A wire hanger
  • Foam pipe cover
  • Pliers
  • Box cutter (not pictured)
  • Outdoor duct tape (not pictured)

You can buy a skull and creepy cloth from Dollar Tree, so this project is not only easy; it’s insanely cheap.  The foam pipe cover is pretty inexpensive, too.  You can get a package at any hardware store for a couple of bucks.  They actually sell white foam cover, too, but for this project I went with the dark gray.

After you’ve gathered your items, it’s time to start the assembly.

First, you need to make holes in the top and bottom of your skull.  Cut a small hole in the top and one that’s a little larger in the bottom.  You won’t be able to see them when you’re finished, so don’t worry about being exactly even.

image
image

Next up, it’s time to make the shoulders (yes, your ghost will have shoulders) and attach it to the head.   My wire hanger was one with the cardboard middles, so I’d recommend using the same kind.  If you only have a full wire hanger, you’ll need to untwist the hanger and shape it so you have a hook in the middle or just use a wire cutter to cut the middle of the bottom hanger bar.

Straighten out the sides of your hanger to make the shoulders of your ghost.

Add the foam pipe to the shoulders on each side and secure in the middle with duct tape.  Use outdoor duct tape for the best results.  That stuff works miracles.

image

Tie your string together to make a circle, and thread it through the bottom of your head up through the top hole or vice versa.  Take the hook of the hanger and thread it through the string from the bottom hole.

image

After you hook the string, pull it through to secure your ghost.  Add a few small pieces of duct tape to the top hole to keep the string from dropping through.  When you’re finished, it will look like this:

image

Your last step is adding the creepy cloth.  Just drape it over the ghost’s shoulders and head, threading the string through a hole in the cloth to secure it.  You can add as much or as little as you want depending on how transparent you want your ghost to be.

Tada!!!  Your ghost is finished!

Processed with Snapseed.

Doesn’t he look cool?  It was so easy that I plan on making a few more.

Processed with Snapseed.

So there you go.  You just made a cool decoration for your yard.  And the beauty of this little project is that you can change it up quite easily.  You can do all sorts of variations to make different kinds of ghosts or other types of monsters.  

  • Paint the head with glow paint.
  • Use white foam cover and cheesecloth to create a classic ghost.
  • Use a foam head with a mask.  
  • Add lights along the shoulders or draped down under the cloth.  
  • Add hands with extra wire and duct tape.
  • Use longer, stronger wire to make a gigantic creature.  

There are so many possibilities.  Not to go self-help on you, but the only thing limiting yourself is you.

I hope you enjoyed this quick and easy tutorial.  If you have any questions, feel free to leave a comment or shoot me a message through the contact page.  Happy Haunting!

Corpsing A Skeleton: An Easy Guide

I just discovered my favorite Halloween DIY project today: corpsing a skeleton.  I’d been hesitant to try it before because I’d only seen tutorials that used sticky adhesive or latex, and I’m cheap enough to not want to “mess up” one of my skeletons.  But after finding a tutorial online that only involved plastic sheeting, a heat gun, and some stain and realizing that I can pick up a new skeleton any time I need, I decided to try it out.

It’s way simpler than I thought it would be, and I love the results.  If you have a skull or skeleton or even just a bone lying around, you should seriously think about giving corpsing a try.

First off, let’s talk supplies.

Processed with Snapseed.

To corpse a skeleton or skeleton part, you need the following:

  • Skeleton/skull/bone
  • Plastic drop cloth
  • Heat gun
  • Spray adhesive (optional)
  • Varnish (assorted colors)
  • Box cutter/scissors
  • Rubber gloves

Speaking of heat guns, just look at this beauty I picked up this weekend, care of a well-timed gift card to Lowe’s from my husband.  He’s a good man.

image

I’m going to go through this step-by-step as if you’re doing a full skeleton, but you can use the technique for whatever part your corpsing.

If you opt to use spray adhesive (and I highly recommend that you do), lightly spray the torso of your skeleton.  Cut a section of drop cloth to the length of the torso, and start wrapping.  You can wrap the full plastic around the torso at one time, or you can wrap in sections.

After you’ve wrapped the torso of your skeleton, it’s time to break out the heat gun.  Focus the heat gun on the plastic, making sure not to stay in one area too long (you don’t want to melt your skeleton).  You should also focus the heat on different sections of your plastic to melt holes strategically around your skeleton.  Corpses don’t rot neatly (I should know), and you don’t want your nasty guy looking too Martha Stewart perfect.  Play around with it.  If you don’t like what you see, add more plastic, and melt it again.

Repeat on each section of the skeleton.  I recommend going in the following order:

  1. Torso
  2. Arms
  3. Legs
  4. Pelvis (overlapping the legs)
  5. Shoulders (overlapping the torso and arms)
  6. Neck
  7. Skull

This is what your skeleton should look like after torso and arms wrapped and shrunk.

Processed with Snapseed.

For the hands and feet, you need to use your box cutter or scissors to cut the plastic around the fingers and toes.  Then, shrink the cut plastic around the smaller bones.

When adding plastic to your skull, it’s much harder to wrap like the other areas, so this is where the spray adhesive really comes in handy.  Take smaller squares of the plastic and spray lightly with the adhesive.  Smash the sprayed plastic on the skull without keeping it straight.  It looks best when it isn’t perfectly flat.  Add heat, and when it looks right to you, you’re finished.

Next is my favorite part of any project: making it pretty!

Using a foam brush, dab whatever color of stain you’re using to the plastic on your skeleton.  You can use any combo of colors you want.  I went with a red and dark brown combo because I wanted my corpse to have that human-jerky look.

After dabbing color on a section, use a paper towel to smear and spread the stain around to hide any brush marks and blend your colors.  When you’re finished and the stain is dry, dry-brush the full skeleton to highlight the sinewy effect of the melted plastic.  I used a moss green here, and I really liked the result.

These are some other color combos you can use:

  • Bloody corpse: red stain with a little black stain added; bright red dry-brushing
  • Toxic corpse: green, gray, and black stains; lime green dry-brushing
  • Buried corpse: light tan and brown stains; black dry-brushing
  • Burnt corpse: dark brown and black stains with red highlights; orange dry-brushing
  • Moldy corpse: green, brown, and tan stains; light green/blue dry-brushing

Play around with it.  There are so many different kinds of paints and stains out there that you can get any look you want.

image

And here’s a close-up of my guy.  The pic really doesn’t do him justice.  He’s much better in person, and I’ve already gotten quite a few compliments.

image

I really hope my newfound corpsing enthusiasm takes some of the trepidation out of corpsing your own props.  I also had a little fun corpsing a Dollar Tree skull, but I’m saving that for another post.  Let me know in the comments if you have any questions or just send me a pic of your project!

And if you’re interested in some other fun things you can make for Halloween, please check out my other tutorials below!

How to Make a Giant Spiderweb

We’re now 6 days into October, so I hope everyone’s Halloween decorating is going well.  I had a full Saturday putting out all of my yard decs, and I feel a little more complete now.  Halloween-time just does that to me.

I’m sure there are some of you out there that feel like you need a little more oomph to your yard, so I thought I’d give a quick tutorial for a simple project that makes a big impact: a DIY giant spiderweb.

Surprised?  You shouldn’t be. That’s the post title.  Keep up.

So for this little project, all you need are a few simple items.

Processed with Snapseed.

As you see in the pic above, you need a good length of clothesline, a few yard stakes, and scissors.  They’re not pictured, but you also need some nails to attach the cobweb to your house.

You basically want to make a six-pointed star with your nails and stakes, with the nails for the top three points and the stakes for the bottom three.  If you’d rather use hooks to attach the web base to your house, that would work, too.

The bottom side point stakes should be positioned a little behind and several feet away from the bottom point stake to ensure you get a good shape to your web.  If you position it too closely, your cobweb could turn out looking a little square.

Optional: If you feel so inclined and your circumstances allow it, you can make an eight-pointed star by using an extra string of clothesline  and a few more nails/stakes.  I think a six-pointed star is sufficient, but you can do this if you want.

After you have your nails and stakes positioned, take an end of the clothesline and tie it to your first nail.  String the clothesline to the stake, tie it off, and repeat it with the side points, crossing over the center string.

To make the rest of the web, start with the center ring.  Tie an end of the clothesline to the center line.  Then, you’ll just wind your rope around each line until you get back to the center line.  See the pic below:

Processed with Snapseed.

Doesn’t look to hard, does it?

And that’s really all you have to do. Rinse and repeat until you get the size of web that you want.  If you want to make sure your strings don’t sag, you can put a drop of glue where you wind the clothesline around itself, but I’ve never had a problem without it.

To make it even better, add a skeleton or body to the center of your web.  My mother-in-law had a few large spiders on hand when I made this web for her last year, so it really made an impact.

Processed with Snapseed.

There you have it.  It’s such an easy project to do, and as you can tell, it gives you a big bang for your buck.  I hope you try it out. Let me know what you think in the comments!

2016 Halloween Merchandise Review: Walmart

Anyone else out there have a love/hate relationship with Walmart?  It sucks you in with the promise of low prices and everything in one place.  I go in for one thing and come out with 20.  Every. Damn. Time.

I live in Walmart country very close to the main office, so I have about 3 dozen or so of these stores within driving distance.  That’s a lot.  And that means it’s way easy for me to go any time I need something, including Halloween supplies.

Processed with Snapseed.

They, of course, have a lot to choose from with dozens of options for lighting, hanging creatures, tombstones, skulls, pumpkins, etc…

And, might I add, their inflatable  game is particularly on point this year.  This threatening tree is pretty cool.  There’s a witch with a cauldron, and if you look really closely, you’ll notice a Halloween Minion (God, why won’t those things die?) and Frankenstein’s monster in the back.

Processed with Snapseed.

And you had to have notice good ol’ Jack, the Pumpkin King himself.

Processed with Snapseed.

I really liked their spider’s web display.  That pirate skeleton is toast.  Not sure how much nutrition the spider’s going to get out of him, though.

Processed with Snapseed.

They had many, many more inflatable decorations, including tombstones, ghouls, a cat that moves it’s head, and a skeleton in camo holding a skeletonized fish.

Walmart even got in on the IDK DIY crafty market with “homemade” wreaths you can buy yourself.  I’ve seen these mainly at craft stores, so I was a little surprised to see them here.

image

Like everyone and their mom this year, Walmart also had a selection of skeleton animals.  Their display is a lacking, but they’ve got vultures and dogs for a good price.

Processed with Snapseed.

And what yard is complete without a cool, tacky skeleton-flamingo?

Processed with Snapseed.

Their food decorating section is quite extensive, and their prices aren’t bad for this kind of stuff.  BUT you might want to just catch these kinds of things on sale at Joann or Michaels to get them cheaper.

Processed with Snapseed.

The costume selection is pretty good this year.  The pic below is of the children’s costume aisle, so they have even more to choose from than what is shown.

Processed with Snapseed.

I’m loving these masks.  I believe I’ll pick up a few this year on sale for a new round of easy props next year.

Processed with Snapseed.

So is Walmart the best Halloween store?  It really depends on what you’re looking for.  I think you can piece together a pretty decent and cheap costume with Walmart’s supplies, and their decorations, although not totally original, are classic and can meet most of your Halloween needs.

If you’re looking for animatronics and larger props, Walmart has those, but you’ll have to look and buy them on their website.  I don’t know about you, but I like to examine stuff before I buy it, especially expensive items like animatronics.  So I’ll probably hold off on buying any of those unless they go on huge clearance.

As of right now, Walmart is where I’ll go to make my costume this year, and I’m sure I’ll be visiting at least one or two of my local stores the day after the big day to score some deals.  I suggest you do the same.